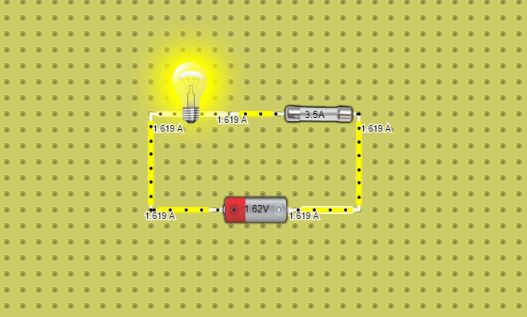
A fuse is a device by which we can protect our circuit and its components from the high current. The fuse relies on the strip of wire or a conductor which gets melt when there is a current supply more than the required level, and so breaks the closed path of the circuit.
Below is the function of fuse explained.
Note : The UI (User Interface) of the lab may look like different since it worked in a flash back then instead of HTML5 which is used in the lab these days.
You have to follow the below steps in order to use the fuse in DCACLAB
Steps to make fuse connection in Lab
Step 1: Browse through the list of the devices and components in the above of the board and locate the fuse as shown below.

Step 2: Click on the icon of the fuse from the options as shown above, You will see a fuse will appear as shown below.

Step 3: Connect the fuse in any circuit as per your requirement.

Components in fuse properties
When the fuse appears, click on it and a gear sign will appear as shown below.

Click on the gear sign and the box with the fuse properties will show up as shown below.

In the above image there are few controllable properties of the fuse available to control which are briefly explained below.

- In this portion you can set the rating of the Fuse you use in ampere. There are two ways you can set the value which are either to use the input box or the scrollbar. With the help of scrollbar you can set the maximum rating up to 10A, however you can set the value up to whatever maximum ampere value of the fuse you want to give with the help of input box.
- You can rotate the fuse on its position from 0° to 90°, 180° and 270°.
How does the Fuse works

In the above image there are two identical circuits shown which has a fuse with the maximum current limit of 3.5 Ampere.
- In the circuit A there is a current of 2.419 Ampere flowing which is less than the current limit of the fuse (i.e. 3.5 Ampere).
- In the circuit B the current would be more than 3.5 Ampere which caused the fuse to blow instead of blowing the bulb from that high current.
In the above example shown we can see how the simple and cheap fuse can protect our useful and expensive components from the fault current.

There are two identical circuits shown above which are similar to the previous circuits explained. This time we have demonstrated that what happens if we use the fuse of rating more than the fault current to flow. In both the cases the current is less than or equal to the specification in the fuse.
- In the Circuit A the component works at the better condition when the current is sufficient for its performance. In the case if we use the fuse with more than the required specification we will not see its disadvantage.
- In the Circuit B there is a current which is more than the sufficient current and the fuse we have used too has the Current specification more than required value. As the result the fuse failed to prevent our component from the high current and so our bulb got burned up.
In the above example, we have learned that how it is to important to use the fuse with the correct rating.
Why should we use the Fuse
There are always the cases when the current exceeds from the decided or the desired amperes which can cause a lot of harm to our circuit as well as its components.
Many circuits contained a handwork and the expensive components which are needed to protect in all cause. The fuse is the best as well as the cheapest way you can protect your hard work and those expensive components.
Advantages of using fuse
- The fuse if the cheapest device with which we can protect our circuit as well as expensive components.
- It does not require any maintenance for further application.
- Unlike to circuit breakers, the fuse does not need our interaction to operate. However, you have to replace the fuse when its burned.


